TikTok become the most popular video-sharing platform these days. Therefore, owning a large number of TikTok accounts will bring many benefits. However, it takes lots of time and effort to create bulk TikTok accounts. In this case, using a TikTok account creator bot will be the best choice.
OUTSTANDING FEATURES OF TIKTOK ACCOUNT CREATOR
- Create bulk TikTok accounts automatically with any kind of email account (Imap enabled)
- Can customize full name, username, and password of TikTok accounts
- Can upload avatars for created TikTok accounts automatically
- Run many threads at the same time
- Can run with rotating proxy
- Free update
- Tutorials in text and video
HOW TO USE TIKTOKCREATOR?
A. Instructions on installing TikTok account creator bot
After you buy our TikTok account creator, you login your account on our website => visit qnibot.com/License => click on Download button in SOFTWARE column, you will see links to download the TikTokCreator software and useragent file.
![]()
Next, you download and unzip the TikTokCreator.zip after downloading this file => open the TikTokCreator folder, you will see 3 folders as the following photo
![]()
A1. Environment variable
Open Environment variable folder, you will see 4 environment variables that you need to set up.
![]()
A1.1. Dotnet-sdk-6.0.407-win-x64
Double-click on dotnet-sdk-6.0.407-win-x64.exe => the Microsoft.NET SDK 6.0.407 (x64) Installer dialog box will display => you click Install
![]()
After the installation is successful, you click on Close
![]()
A1.2. Node-v19.8.1-x64
Double-click on node-v19.8.1-x64.msi =>Note.js Setup dialog box will appear => click on Next
![]()
Next, you tick ![]() I accept the terms in the License Agreement => click Next
I accept the terms in the License Agreement => click Next
![]()
Then, click Next as the following photos
![]()
![]()
![]()
Then, you click on Install
![]()
After completing the installation, you click on Finish
![]()
A1.3. SqlLocalDB
Double-click on SqlLocalDB.msi => Microsoft SQL Server 2019 Local DB dialog box will appear => click on Next
![]()
Next, click on I accept the terms in the license agreement => click Next
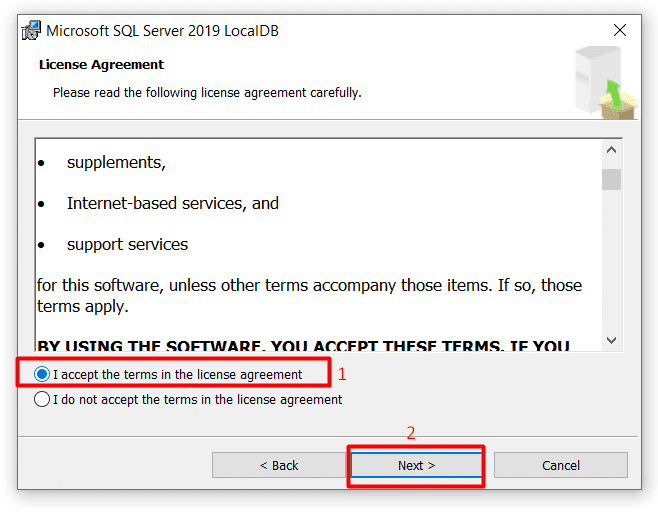
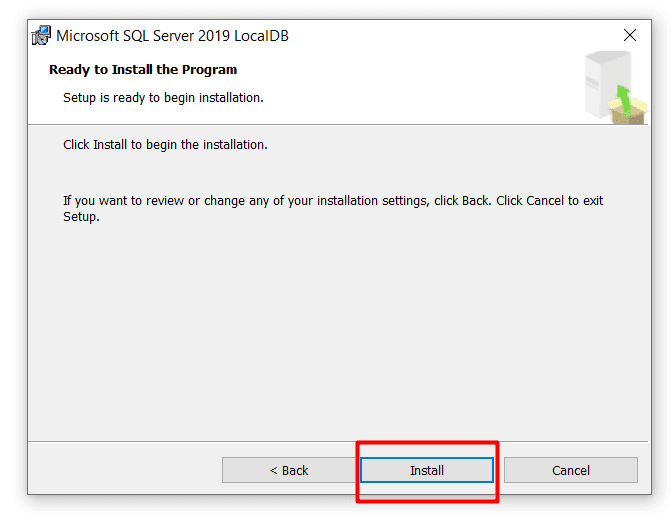
Then, click on Install
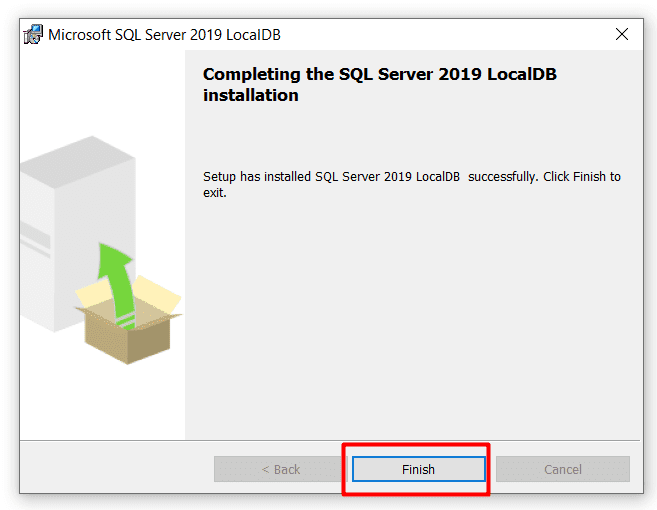
Finally, click on Finish
A1.4. Vc_redist.x64
Double-click on vc_redist.x64.exe => you tick ![]() I agree to the license terms and conditions => click Install
I agree to the license terms and conditions => click Install
![]()
After the Setup is successful, you click on Close
A2. Install TikTok account creator bot
Open the TikTokCreator folder => open Setup folder => double click on TikTokCreator.exe or Setup.exe to install the software => Click Next as instructions on the TikTokCreator dialog box.
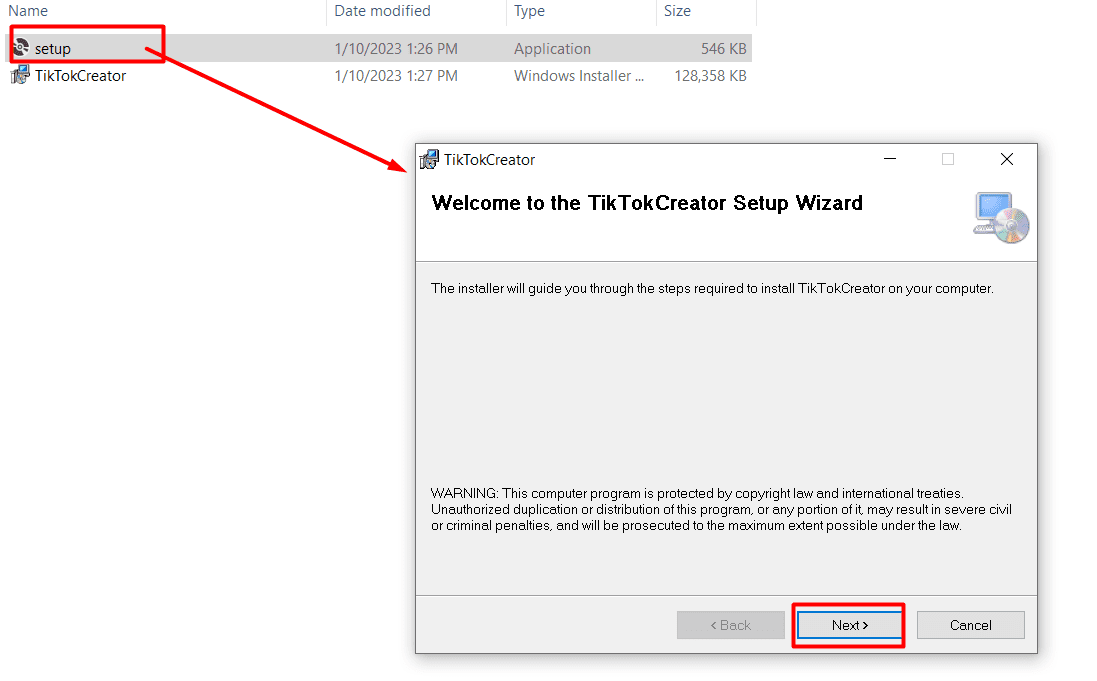
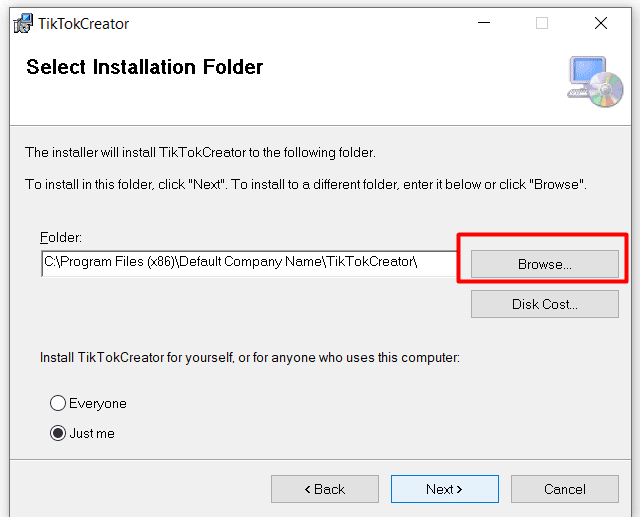
Next, click on Browse and select the folder where you want to save the installation, DO NOT install the software to default folder Program Files (x86) . Choose your folder and => Click Next
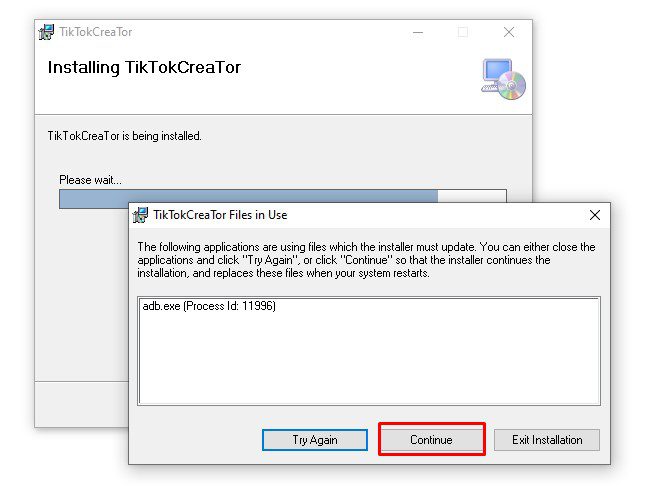
Then, you click on Continue
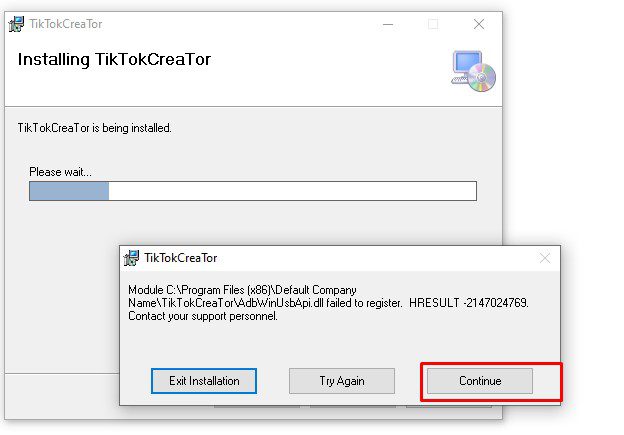
Then, click on Continue one more time
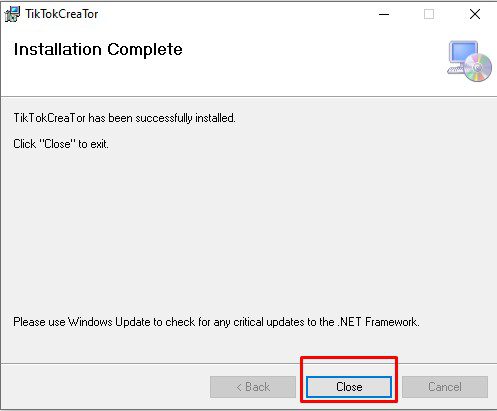
Next, click Close
Then, TikTokCreator bot will display the shortcut on your desktop as the following photo => double-click on the TikTokCreator shortcut to open the bot
![]()
Next, you login your account on our website => visit qnibot.com/License, you will see your license in KEY column => enter the provided key into License Key section
![]()
And, open the LDPlayer folder (one of three folders in TikTokCreator folder) => copy the path of this folder to paste it into LDPlaryer Path
![]()
Next, click OK
Then, you will see the interface of TikTok account creator bot
![]()
B. How to create bulk TikTok accounts using TikTokCreator?
B1. LD Player
LD Players are the emulators that the bot will run at the same time. You need to create the LD Player before running the TikTok account creator. The number of created LDPlayer must be more than or equal to the number of threads (refer to B3. Threads section).
Click on Setting => select Setting LD_Player as the following photos
![]()
![]()
Then, the LDMultiPlayer dialog box will appear => you tick on 0 LDPlayer => click on Batch => select Batch clone (5 LDPlayers). Then the bot will create 5 LDPlayer for you. If you want to create more LDPlayer, continue to click on Batch clone (5 LDPlayers).
Note: do not click on Batch New
![]()
Then, click OK
B2. Run
Run section shows the number of times that you want the TikTokCreator bot to run successfully.
For example, if you put 25 into Run, TikTok account creator bot will stop automatically after running successfully 25 times.
![]()
B3. Threads
Threads section presents the number of accounts that you want to create at the same time.
For example, in case you put 15 into Threads, our TikTok account generator will open 15 windows and create 15 TikTok accounts simultaneously
![]()
Note:
- You should enter the appropriate number of threads, which complies with your computer configuration. The higher configuration of your PC is, the more threads you can run at the same time.
- The number of threads must be less than or equal to the number of created LD Player (refer to B1. LD Player section).
B4. Profile Data
These sections save information that the TikTokCreator bot will use to create new TikTok accounts.
![]()
B4.1. Password
There are 2 options for you to choose
- In case you click on Customize in Password section, you enter the password you want the bot to use when creating new TikTok accounts.
![]()
Note: the imported password needs to consist of 8 characters at least, including 1 uppercase letter, 1 number, and 1 special character at least.
- In case you click on Create Password With Characters. you enter the number of characters that you want the bot to create.
![]()
B4.2. Full Name
There are 2 choices in this section
- Click on Random if you want our TikTok account creator tool to use random names in order to create TikTok accounts.
![]()
- Click on Customize if you want to customize the name => create a text file to save the name that you want the TikTokCreator to create => click on Open at Customize section => select the created text file.
![]()
Note: you enter each name per line in the text file.
B4.3. User
You have 2 selections here
- Click on Random if you want the software to create usernames in random
![]()
- Click on Customize if you want to customize the username of created TikTok => create a text file to save the username that you want the TikTokCreator to use to create TikTok accounts => click on Open at Customize section => select the created text file.
![]()
B4.4. Upload Avatar
If you want the bot to update avatars for accounts right after creating them, you tick on Upload Avatar
![]()
Next, create a new folder to save photos that you want to use as avatar => click on Open at Upload Avatar section => select the created folder of images.
![]()
In case you do not want to upload avatars for created accounts, leave this section blank.
![]()
B5. Proxy Setting
Click on Setting => select Setting Proxy as the following photos
![]()
![]()
Then, you will see the Proxy Source dialog box as the photo shown
![]()
B5.1 Use proxy
There are 2 types of proxy that you can use with our TikTok account creator bot, including https and sock5. Firstly, you click on the type proxy that you want to use.
Next, you need to import proxy at File Proxy section
- In case you click on File Proxy, you need to create a text file to save proxies per line in format IP:Port:ProxyUsername (if any):ProxyPassword (if any) => click on Open at File Proxy section => select the created text file of proxy.
![]()
Then, you will see a dialog box asking for confirmation to import proxy => click OK
![]()
- In case you click on Default URL, you need to enter the URL link of proxy
![]()
Finally, you click OK.
B5.2. Do not use proxy
If you do not want to use proxy, click on No Proxy. TikTokCreator bot will use the IP of your PC.
![]()
Note: you should use proxy to create bulk TikTok accounts because creating too many TikTok accounts with the same IP will lead to being banned.
Refer to Saferproxy.com to rent safe and cheap proxy
Finally, you click OK.
B6. Email Setting
Click on Setting => select IMAP Setting as the following photos
![]()
![]()
Then, you will see the Email Setting dialog box as the photo shown
![]()
B6.1. Email File
First, you create a text file to save email accounts that you want to use to create TikTok accounts. You enter emails per line in the format Email,Password. We highly recommend using Hotmail to create TikTok accounts in bulk.
![]()
Next, click on Open at Email File section => select the created email text file.
![]()
Then, you will see a dialog box asking for confirmation to import the email => click OK
![]()
B6.2. Imap Server and Port
You need to activate Imap of email accounts before using them to create TikTok accounts.
Next, you need to search on Google to get Server and Port of Imap, then enter them into Imap Server and Imap Port sections.
![]()
For example
Imap Server and Imap Port of Hotmail
![]()
Then, you click Ok => close the Email Setting dialog box.
Finally, you click Start to run the software.
![]()
B7. How to get results?
There are 2 methods for you to get the created TikTok accounts.
- Method 1: You click on Data as the following photo to see created TikTok accounts.
![]()
![]()
Next, click on Export File to export the file containing created accounts as you want => select the folder that saves the exported file => click Save
![]()
- Method 2: Click on Result tab => click on All Result => you will receive a text file named Result containing all created accounts.
![]()
Tutorial Video
Thank you for following this tutorial.
PRICE OF TIKTOK ACCOUNT CREATOR TOOL
For more details, kindly contact us at Contact